This step-by-step guide will teach you how to create and add new Racemenu overlays (body paints, hand paints, foot paints, etc.) to Skyrim. This includes both creating the design and adding it into your game.
Part 1 covers the creation of the overlay design – if you’ve already created your design, feel free to skip to Part 2 for how to add it to your game.
When I first began experimenting with this, I assumed it would be a fairly straightforward and easy thing to do – most character customization options are. I was wrong, and it was significantly more complex than I anticipated, and most already existing guides assume you already have a significant amount of things set up in your modding environment, as well as knowledge beyond what the casual modder would typically have. This guide aims to be as easy to follow and new-modder friendly as possible, though be aware that several of these steps are slightly complex so please follow directions carefully.
Requirements
1. Skyrim Creation Kit
2. Photoshop (free trial, purchase, or download CS2 for free) or GIMP (always free)
3. DDS plugin for your editing software (downloads: Photoshop | GIMP)
4. Text editor; you can use Notepad (Windows default) but I recommend Notepad++
5. SKSE
6. Racemenu Modders Package (go to Files, find Modders Package for current version)
Preparing Your Workspace
This section will be significantly easier if you’re familiar with your graphics software, and does assume a basic level of competency in that regard.
Firstly, we’ll want a body texture to work from. While this step is not strictly necessary, since we’re doing this entirely via graphics editor (rather than with a 3d view), you’ll want to do this for your own sanity/ease of use. You can acquire a body texture from either the Skyrim base files if you’ve previously extracted the textures – they’re stored in textures/actors/character/female or male. They’re also slightly hideous. Alternatively, if you haven’t extracted the textures or find the Skyrim textures too awful to look at, you can simply download one of many popular body texture mods and use that as a reference. I typically use UNP for females and one of the Better Males textures for males (both links/textures somewhat NSFW). Keep in mind the texture itself is irrelevant and won’t be part of your overlay, we’re just going to be using it as a guideline for placement.
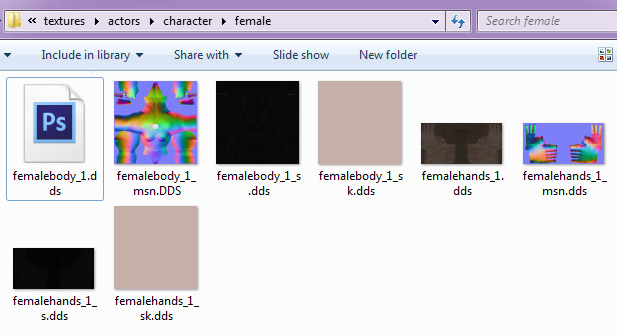
If you’re downloading your textures, you’ll want to select the “manual download” option on the mod page. After your download finishes, extract the textures folder from the zip file somewhere easy to find. Navigate to textures/actors/character/female (or male), and find femalebody_1.dds or malebody_1.dds. This is the main body texture file; if you’re interested in creating hand overlays, you would instead open the corresponding texture file, e.g. femalehands_1.dds.
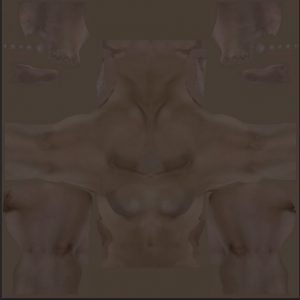
Open the body texture in your graphics editing software. If your texture exceeds 2048×2048 (“2k”) in size (many body textures come in 4096×4096, “4k”), I’d suggest resizing it down to 2048×2048 unless you specifically prefer the larger size.
To resize your image:
- Photoshop: Image (top bar) -> Image Size -> Set your new height and width.
- GIMP: Image (top bar) -> Scale Image -> Set your new height and width.
You should now have your body texture open and are ready to begin work on your actual design.
Creating Your Design
Since there are many ways of doing this, and much will depend on your specific design, this is a basic overview to get you started.
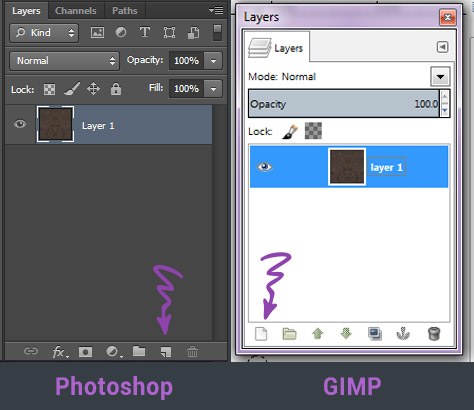
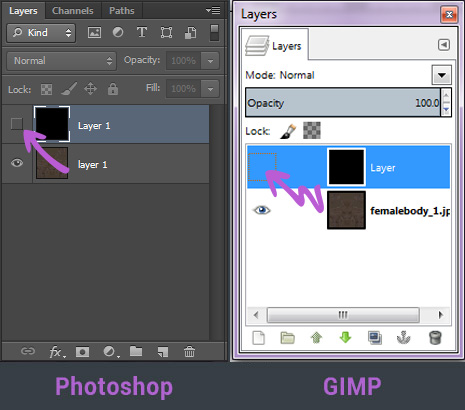
1. Create a new layer over your body texture:
2. Fill your new layer with black color using the paint bucket tool. This could really be any color, though black/white/greys are typically easiest to work with in my opinion. Your image should now appear completely black. Note: If using Photoshop, on first launch the paint bucket tool may be ‘hidden’ behind the gradient tool on the toolbar (they share a place on the toolbar in some versions). If this is the case, simply click and hold on the gradient icon until the option to select your tool comes up.
3. Now we’re going to hide the black layer you just created. While this may seem unintuitive, we’re going to use that layer later.
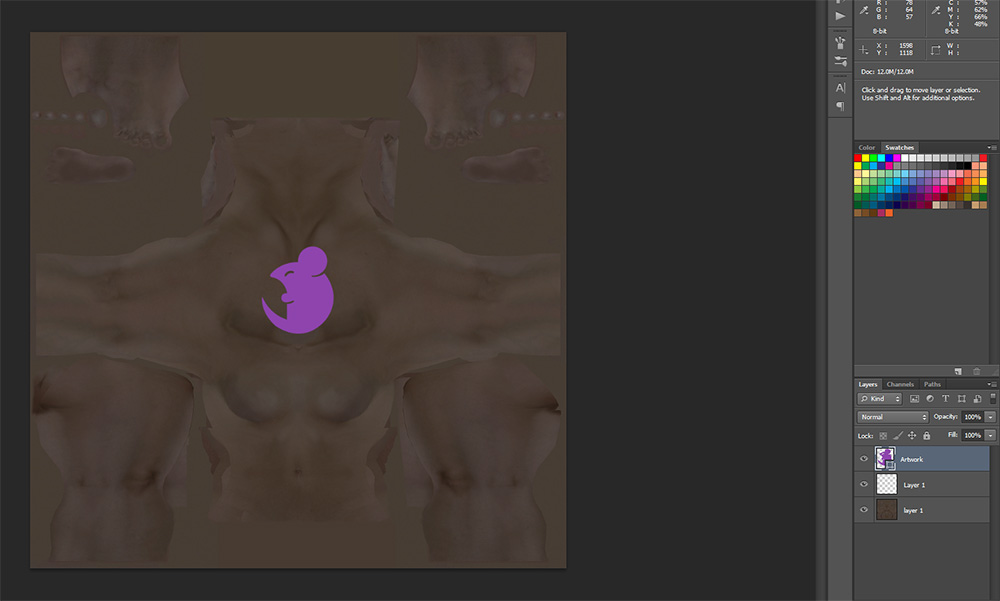
4. Create another new blank layer like you did in step 1. This is the layer you’ll create your design on. For the sake of this tutorial, we’re going to paste a simple design into it, but you can draw your design from scratch with some basic drawing & editing skills, or follow one of many online tutorials for creating digital/vector art. Here’s our design and layer palette after pasting it into the template we’ve prepared:
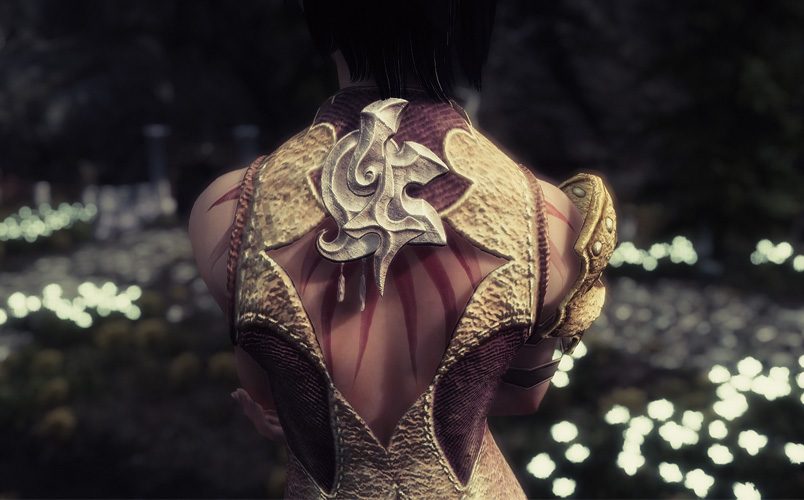
5. We’ll need to adjust the positioning and orientation of the design in order to fit both where we’d like it to appear on the body, and how it should be sized/facing. This can be a little tricky, and may require some experimenting in-game. We’ll start with a simple tattoo in the center of the back:
Note that I’ve flipped my design upside down – this is because the character’s back texture is going in the reverse direction of the chest. See the below simple chart for what I mean.

6. Now that your design is in place, if there’s any color in it (like there is in my example) we need to remove it. For vector shapes (i.e. created with the pen tool or imported shapes) this is extremely easy: just double click the layer thumbnail in the layer palette and change the color to something greyscale. For other layer types (called “raster” layers), we’ll need to do this manually. Make sure your design layer is selected, and go to…
- Photoshop: Image (top bar) -> Adjustments -> Hue/Saturation…
- GIMP: Colors (top bar) -> Hue/Saturation…
In the following menu, set the Saturation value all the way to the left.

Additionally, you may want to adjust the lightness of your image. When imported into Racemenu, if an image is very bright (white) it will have a less wide range of colors it can receive, and will sometimes appear washed out. I’d recommend adjusting the lightness until your image is a very dark grey. Don’t worry – you can always come back and adjust the design and colors later if it doesn’t appear how you’d like after it’s applied to the character.
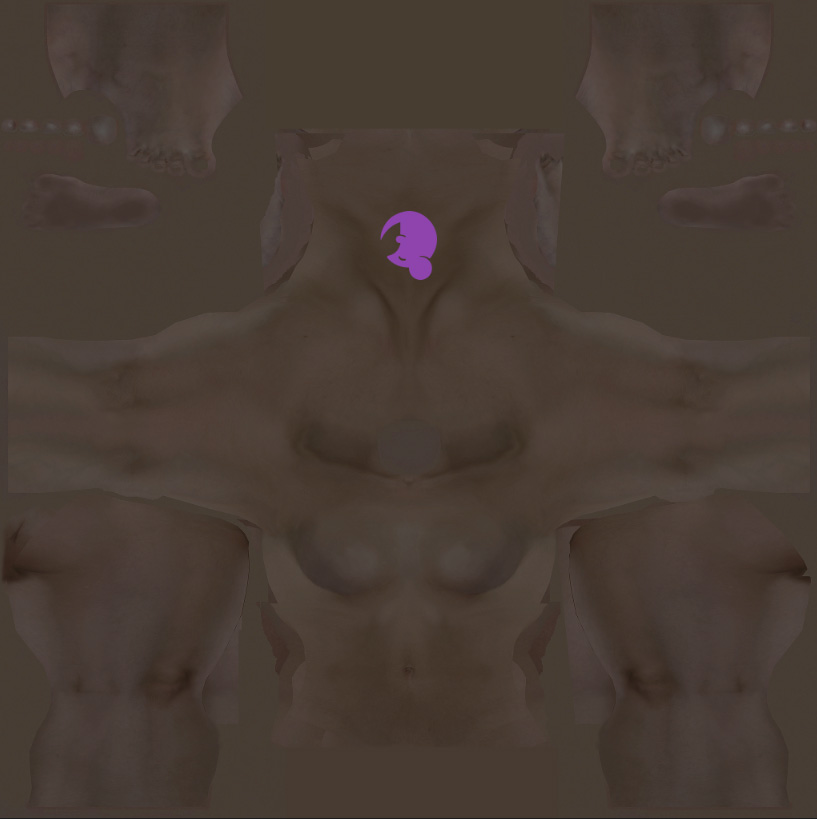
7. Remember your hidden black layer? Unhide it now, the same way you hid it before – by clicking the empty box to the left of the layer thumbnail. Your design should now be isolated over your black background.

8. You’re nearly done, but this part gets a little tricky, especially for GIMP users. A little background on what we’re doing here: Racemenu doesn’t actually care much about how the design we’ve created so far looks, aside from its color – the entire image could be black and it wouldn’t matter. What actually matters here the Alpha Channel, which determines which parts of the image are transparent or not. You’ll need to effectively ‘copy’ the design you’ve created into the alpha channel of the image. This process is significantly different between Photoshop and GIMP, with Photoshop being significantly easier (imo).
8.1 Creating the Alpha Channel in Photoshop
At the top of the layer palette, you should notice another tab, “Channels”. Click it. You should already have several channels listed, named after colors. Create a new alpha channel by clicking the icon at the bottom, the same icon as you previously used to create a new layer.
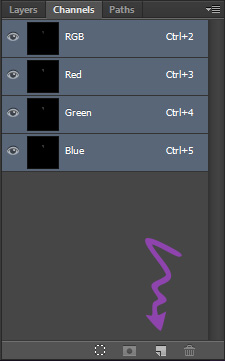
Your new channel should appear entirely black in the channel thumbnail. Alpha channels work differently than normal layers; in this case, solid black represents a transparent part of the image, and solid white represents a visible part of the image.
Go back to the layers palette via the Layers tab. CTRL + click on your artwork layer to create a selection around it. If you’ve used multiple layers to create your design, that’s fine too – you can either merge them together for this part, or select them one at a time.

Switch back to the Channels tab and click on the alpha layer you’ve created. Using the paint bucket tool, fill your selected area with a solid white color (#fffff). If you have any additional layers, or any parts of your design not filled, repeat this as necessary until your entire design appears white on the alpha channel, like in the following example.
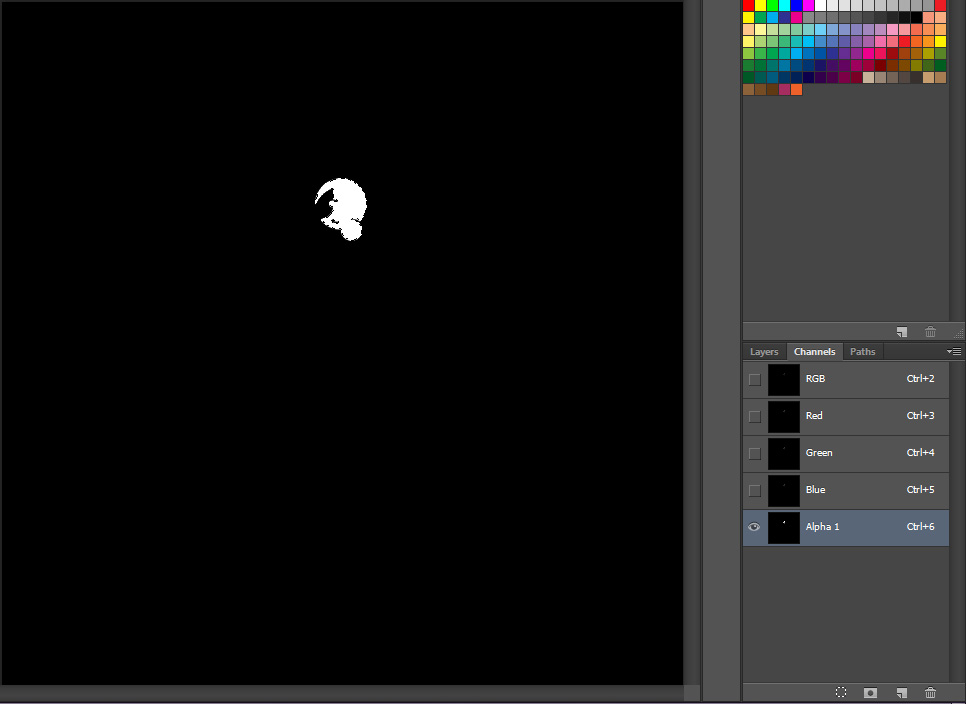
After your full design is copied into the alpha channel, you’re ready to jump below to step 3: saving.
8.2 Creating the Alpha Channel in GIMP
GIMP conveniently creates its own alpha channels as soon as a second layer is added, so we’re just going to go through some steps to make sure everything is set up correctly.
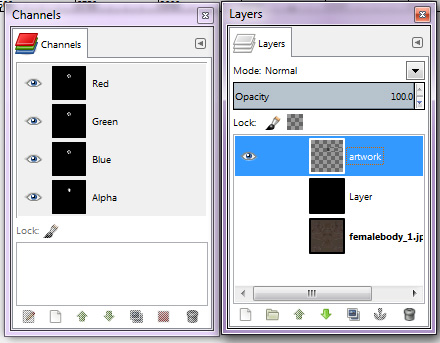
By default, the channel dialogue is not shown, so if you don’t see it, you’ll want to enable it by going to Windows (top bar) -> Dockable Dialogues -> Channels, and then moving it somewhere convenient.
Hide all layers (clicking the eye next to them on the layer dialogue) except for your artwork layer. When looking at the channels dialogue, you should see your design filled with solid white on the alpha channel.
If for some reason the alpha channel does not match your artwork, it’s a bit harder in GIMP to correct than it would be in Photoshop. Depending on how you created your design, this is fairly unlikely, but if you do need to correct your alpha channel, there’s a fairly simple guide on doing that here.
Saving Your File
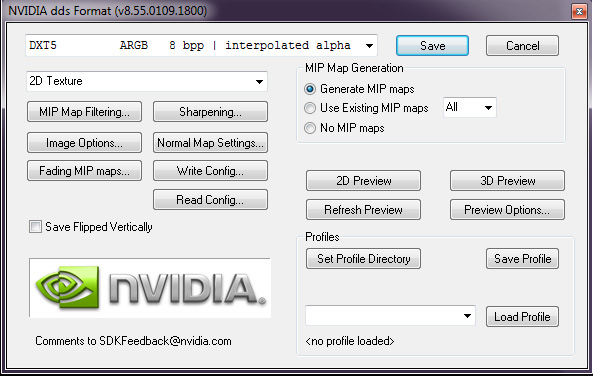
Although the save dialogues appear differently between GIMP and Photoshop, there are only a few important settings you need to ensure when saving your work.
- The type must be DTX5 ARBG.
- Generate MIP maps.
So that you don’t need to move it later, you can save your work directly into your Skyrim directory. An example path (and what we will use for this guide) would be C:\Program Files (x86)\Steam\steamapps\common\Skyrim\Data\Textures\Actors\character\overlays – creating any folders that don’t already exist.
You can name your file however you want, but more descriptive names are generally helpful.
Now that your design is created, we need to begin the work of getting it into the game.
Continue to Part 2
[…] How to Create New Body Paints and Overlays for Racemenu (Part 1) […]
Your guide is awesome! Thank you for creating it. One question I have though is the alpha channel part in photoshop. For whatever reason, I cannot get it to work and the only work around I found was to export my image as a png and then finishing the alpha channel part in Gimp…I’m not exactly sure what I am doing wrong, so any guidance would be helpful. Thanks!
This guide looks great, it’s marked for classic Skyrim, but will it be the same basic workflow for Special Edition?